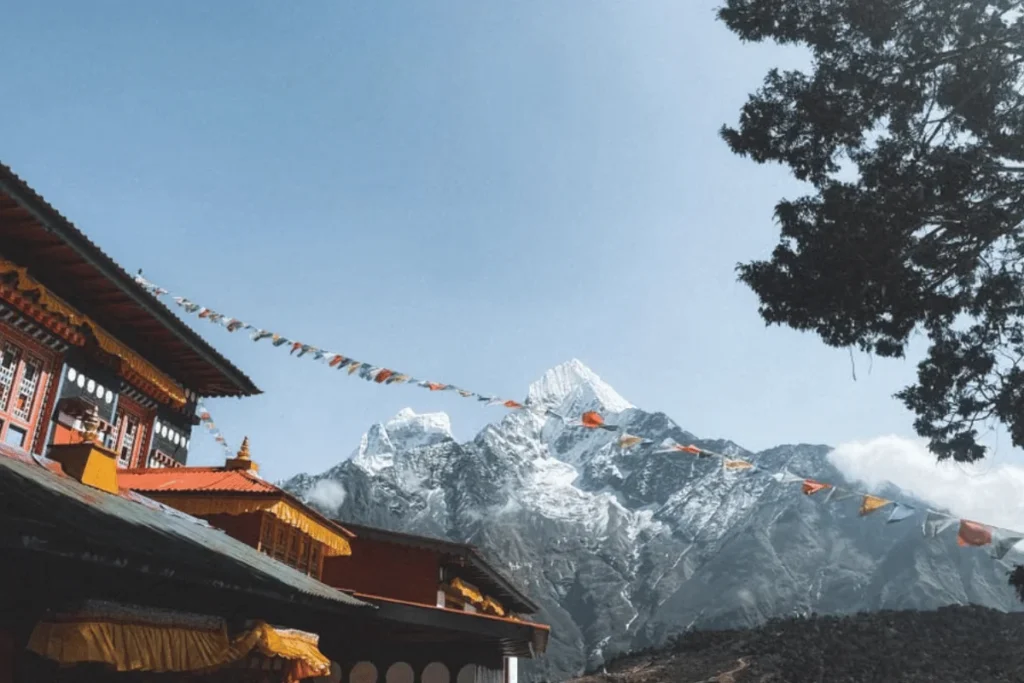
Nepal doesn’t ease you into photography adventure. It throws you straight into it. One morning you’re photographing prayer flags snapping against an 8,000-metre skyline, and by afternoon you’re in a Kathmandu courtyard where the light falls through centuries-old wood carvings. It’s a lot for a beginner to take in, and an even bigger temptation to overpack a camera bag for.
The good news is that you don’t need a professional kit or years of experience to come home with images you’re proud of. You need the right gear for the trip you’re actually taking, a little understanding of how Himalayan light and altitude behave, and a few habits that keep your equipment working when it matters. Here’s what to know before you go.
1. Pack Light, Shoot Big: Choosing the Right Gear
The biggest mistake beginners make in Nepal isn’t a settings mistake, it’s a packing mistake. Extra lenses, a second camera body, and a full tripod add up fast when you’re also carrying trekking gear and gaining altitude every day.
A simple, well-chosen kit will outperform a heavy, half-used one:
- One capable mirrorless or DSLR body, smaller and lighter than older gear, with strong low-light performance for temple interiors and dawn starts.
- A versatile zoom lens (roughly 24-105mm equivalent) instead of several primes, for everything from street scenes to mountain panoramas.
- A compact travel tripod for sunrise viewpoints, long exposures, and low-light shrines.
- A dependable memory card and a spare, plus a lightweight rain cover if you’re trekking during shoulder season.
If you don’t already own gear suited to altitude and weight limits, renting is usually the smarter beginner move. You get current, well-maintained equipment without flying it halfway around the world or committing to a purchase before you know what style of photography suits you. Kimbu Rental’s cameras and lenses collections in Kathmandu are built for exactly this: pick up gear on arrival, use it for the trip, and hand it back instead of hauling it home.
2. Learn Nepal’s Light Before You Learn Your Camera
Understanding when and where to shoot matters more than any camera setting. Nepal’s light behaves differently depending on altitude, season, and location, and beginners who plan around it get noticeably better results than those who just point and shoot at midday.
A few patterns worth building your day around:
| Location | Best Light | Why It Works |
| Sarangkot / Poon Hill | Sunrise | Mountain panoramas glow before haze builds up |
| Kathmandu Durbar Square | Early morning or late afternoon | Softer light, fewer crowds, warm tones on old brick and wood |
| Nagarkot | Sunrise and sunset | Wide Himalayan range visible on clear days |
| High-altitude trekking trails | First and last light | Thinner air makes midday sun harsh and contrasty |
At altitude, the sun is more intense and shadows are harder-edged than at sea level, so the golden hours right after sunrise and before sunset matter even more than usual. If you only have energy for one early start on a trek, make it a sunrise.
3. Camera Settings That Save Beginner Shots in the Himalaya
You don’t need to master full manual mode before you land, but a few settings habits will rescue shots that automatic modes typically get wrong in Nepal’s conditions.
- Watch for blown-out snow and sky. Cameras tend to underexpose bright snow and glaciers, turning white grey. Dial in a touch of positive exposure compensation (+0.3 to +1) when shooting snowfields or bright peaks.
- Shoot in Aperture Priority mode as a beginner-friendly middle ground: you control depth of field while the camera handles shutter speed.
- Use a tripod indoors. Monasteries and temple interiors are often dim, and a tripod lets you keep ISO low instead of noisy and grainy.
- Bracket tricky scenes. If you’re unsure of exposure on a mountain panorama, take one shot as metered, one brighter, one darker, then pick the best later.
A lightweight tripod earns its weight the moment you’re photographing a dawn ridge line or a candlelit shrine. Kimbu Rental’s tripod and support range covers trail-friendly options if you’d rather not carry your own.
4. Keep Your Gear Powered and Protected at Altitude
Cold air is hard on batteries, and altitude has a way of draining them faster than you’d expect at home. A battery that lasts all day in Kathmandu can fade in a few hours on a high pass.
Some habits that make a real difference:
- Carry at least one spare battery per camera and keep it in an inside pocket, close to your body heat, rather than in an outer bag pocket.
- Bring more memory cards than you think you’ll need. Trekking regions have limited or no places to buy them, and cloud backup isn’t reliable without steady internet.
- Pack a small dry bag or rain cover for the monsoon and shoulder seasons, when afternoon showers are common even on clear-morning days.
- If you’re on a multi-day trek, a power bank or portable charger is worth the extra weight, since mains power in teahouses can be limited or paid by the hour.
If you’d rather not travel with your own batteries, chargers, and storage, Kimbu Rental’s power and storage categories are worth a look alongside your camera rental.
5. Permits, Etiquette, and Rules Every Beginner Should Know
A few practical rules affect photographers specifically, and it’s worth knowing them before you’re standing at a checkpoint or a monastery gate.
- Guides are mandatory on national park and conservation area trekking routes. Since the rule took effect in 2023 and has been consistently enforced through 2026, foreign trekkers on routes like Annapurna, Langtang, and the Everest region must trek with a licensed guide. This isn’t only a safety requirement: a local guide often knows the best viewpoints and timing better than any guidebook.
- Drones require a permit, regardless of size. As of 2026, Nepal’s Civil Aviation Authority (CAAN) requires registration and a flight permit for essentially every drone, including small consumer models, and there’s no casual exemption for tourists. Processing can take one to several weeks, no-fly zones exist around airports and heritage sites, and flying without a permit risks confiscation. If aerial footage matters to your trip, start the paperwork well before you land, or budget time in Kathmandu to sort it out through a registered agency.
- Photographing people and sacred spaces calls for a little more care than a landscape does. Ask before photographing individuals up close, especially in villages. Some temple interiors and specific deities prohibit photography altogether. Look for posted signs, and when in doubt, ask.
6. Simple Composition Tips for Nepal’s Mountains, Streets, and Faces
Good composition matters more than gear once you’re actually standing in front of a view like this. A few habits go a long way for beginners:
- Use foreground layers. Prayer flags, stone chortens, or a trail switchback in the foreground give scale and depth to a mountain backdrop that would otherwise look flat.
- Slow down in the old squares. Kathmandu, Patan, and Bhaktapur reward patience: find a spot with good light, wait, and let the scene come to you rather than chasing shots.
- Ask before you shoot portraits. A smile, a gesture toward your camera, and a moment of eye contact go further than a long lens ever will, and they usually lead to a better photo anyway.
- Don’t skip the in-between moments. Steam off a dal bhat plate, prayer wheels mid-spin, boots drying by a teahouse stove: these smaller frames often end up being the photos people remember most.
FAQ
Do I need to bring my own camera, or can I rent one in Kathmandu?
You can rent. Kimbu Rental supplies cameras, lenses, tripods, and accessories out of Kathmandu, so many beginners arrive with just a phone and pick up a full kit locally rather than flying with fragile gear.
What’s the best beginner camera for a Nepal trip?
A lightweight mirrorless body with a versatile zoom lens is the easiest starting point. It handles everything from street scenes to mountain panoramas without the weight of multiple lenses.
Do I need a permit to fly a drone in Nepal?
Yes. As of 2026, every drone needs CAAN registration and a flight permit regardless of size, and there are no-fly zones around airports and heritage sites. Apply well ahead of your trip or work with a registered agency in Kathmandu.
What’s the best time of year for photography in Nepal?
October to November and March to April generally offer the clearest mountain views and most reliable weather, though Kathmandu’s old squares photograph well in most seasons if you plan around the light.
Can I rent extra batteries, a tripod, or memory storage along with a camera?
Yes. Pairing a camera rental with a spare battery, tripod, and storage card is a common setup for trekking trips, since cold weather and limited shops on the trail make backups worth having.
Ready to Shoot
Nepal doesn’t need a professional kit to reward a beginner. It needs the right gear for the trip, a plan built around the light, and enough respect for local rules and communities to shoot without friction. Bring that, and the country does most of the work.
If you’d rather rent than pack, browse Kimbu Rental’s full collection or get in touch and the team will help put together a kit for your route, season, and experience level.